HOW TO BUILD BEAUTIFUL BUTTOCKS WITHOUT SQUATS?
Squats are considered the main exercise that can transform the shape of the buttocks. But what to do for those for whom they are banned, and you really want to become the owner of the “priests-nut”? Train according to the scheme we will show you today. As a rule, squats and lunges are prohibited for people with injuries and diseases of the knees and spine.
BEAUTIFUL BUTTOCKS WITHOUT SQUATS: IMPORTANT POINTS
However, in this case, it is quite possible to pump up beautiful buttocks. “Here, different variations of leg swings from a standing position or on all fours come to the rescue, as well as lifting the pelvis while lying down,” comments Anastasia Solodova, master trainer of the group programs direction of the federal network of X-fit fitness clubs and the author of the complex that we will show you today … – The training regimen is of fundamental importance here: it is important to observe a certain combination of repetitions of exercises. Relatively speaking, in one short lesson it is necessary to combine static and multi-repetitive work with a small range of motion, performing the so-called springs. ”
We asked Anastasia to design a workout taking into account all these points. Let’s start the lesson!
HOW TO BUILD A WORKOUT
Start with a 10-minute warm-up (articular gymnastics is suitable), and end with stretching.
Perform the exercises in sequence. “Please note: some combinations of movements are performed first on one leg, then on the other. For example, we first perform the second and third exercises with the left foot, and then in the same sequence – with the right, – adds Anastasia Solodova. – The same goes for the fourth and fifth exercises.
Exercise 3-4 times a week.
To complete the complex, you will need a rug and a chair (or bench).
FIRST EXERCISE
Lie on your back, place your feet on a chair (bench) so that your knees are bent at right angles. Connect your feet, press your knees together (and do not part them during the exercise), slightly twist the tailbone inward. Don’t strain your neck. As you exhale, push your pelvis upward, contracting your buttocks and relaxing your lower back. Hold at the top point for a few seconds and, with inhalation, lower yourself to the starting position. Do the exercises and move on to the next one.
SECOND EXERCISE
Lying on your back in the starting position of the first exercise, lift your pelvis off the floor (half the amplitude). Then bring your left knee to the side and place your foot on your right thigh. With an exhalation, push the pelvis up (in full amplitude), with an inhalation, lower it again to half the amplitude (that is, do not touch the floor with your buttocks). Exercise on one leg, then immediately move on to the next movement.
THIRD EXERCISE
From the starting position of the second exercise (the pelvis is raised above the floor in half the amplitude, the left foot is on the right thigh), push the buttocks up (to the highest point) and straighten the left leg, directing the toe to the ceiling. Fix this position for one minute, observing the breath: inhale the air through the nose, and direct the exhalation to the stomach. After completing this movement, repeat the second and third exercises on the other leg.
FOURTH EXERCISE
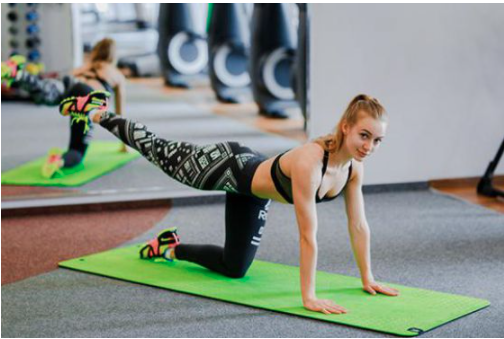
Get on all fours (palms under the shoulders, knees under the pelvis), do not bend in the lower back. Raise your left knee off the floor and, with your heel pointed towards the ceiling, slightly bend your leg up. As you inhale, bring your knee down, and as you exhale, push your foot up. Perform 20 repetitions of the movement, then fix the leg at the top point for a minute, and then do 9 more “springs” (that is, movements with a micro-amplitude). Without lowering your left knee to the floor, proceed to the next exercise.
FIFTH EXERCISE
From the starting position of the fourth exercise, push the left knee up, and, lowering it down, take it crosswise behind the right thigh. Perform 20 repetitions of the exercise at full amplitude, then three more “springs” at the top.
Then stretch your leg back and touch the floor with your toe. From this position, push your leg upward, directing your heel toward the ceiling. Perform 20 of these movements, then repeat all steps of the fourth and fifth exercises on the right leg.
Exercise regularly, tracking your technique and your own feelings. Try to work at a medium to slow pace – rushing can reduce the effectiveness of the exercise.